How to Change Aquarium Water Easily Without Fancy Tools
Changing aquarium water doesn't require fancy tools—just simple items like a bucket and mug. Regular partial water changes keep the tank clean, fish healthy, and water clear. Using basic methods like manual scooping, gravel stirring, and dechlorinated tap water can maintain a balanced aquarium environment. With patience and consistency, even beginners can manage aquarium maintenance easily at home without expensive equipment.
🐶 Pet Star
41 min read · 2, Jul 2025
Introduction
Changing aquarium water is a crucial part of fishkeeping that ensures a clean, safe, and healthy environment for your aquatic pets. However, many people assume that this task requires expensive siphons, filters, or automated systems. The truth? You don’t need any fancy equipment to do it effectively.
With a bit of knowledge and a few everyday household items, you can perform water changes efficiently and keep your aquarium in top condition. In this article, we’ll guide you step-by-step on how to change your aquarium water using simple tools, why it's important, and tips to make the process easy and stress-free. Changing aquarium water, a fundamental and non-negotiable aspect of maintaining a healthy and thriving aquatic ecosystem, might seem daunting to beginners or those without specialized equipment, but it is in fact a remarkably straightforward process that can be performed easily and effectively using readily available household items. This routine maintenance, often referred to as a "water change," is critical for diluting and removing accumulated nitrates, phosphates, and other dissolved organic compounds that are toxic to fish and invertebrates, replenishing essential trace elements, and maintaining stable water parameters. Without regular water changes, these harmful substances build up, leading to poor water quality, algae blooms, stress, disease, and ultimately, a shortened lifespan for your aquatic inhabitants. While fancy gravel vacuums, Python water changers, and intricate filtration systems certainly streamline the process, a well-executed manual water change is just as effective in safeguarding the delicate balance of your aquarium, proving that consistent, mindful care outweighs the need for expensive gadgets.
The first and most crucial step in any water change is preparation, ensuring you have all necessary items ready and within reach. You will need a clean bucket (dedicated solely to aquarium use to avoid chemical contamination from detergents or other household products), a siphon hose (a simple piece of flexible tubing, readily available at hardware stores, pet shops, or even online, with a diameter appropriate for your tank size – usually 0.5 to 1 inch for most home aquariums), aquarium-safe dechlorinator/water conditioner (absolutely essential to neutralize chlorine and chloramines in tap water, which are highly toxic to fish), and a thermometer to ensure the new water matches the tank's temperature. Optional but helpful items include a small net for catching any floating debris, and towels for inevitable spills. Crucially, the new water should be prepared a few hours or even a day in advance in the clean bucket. Fill the bucket with tap water, add the appropriate amount of dechlorinator according to the product's instructions, and allow it to sit to reach room temperature, ideally matching the aquarium's temperature as closely as possible (within 1-2 degrees Fahrenheit) to prevent temperature shock to your fish. Temperature fluctuations can stress fish, weakening their immune systems.
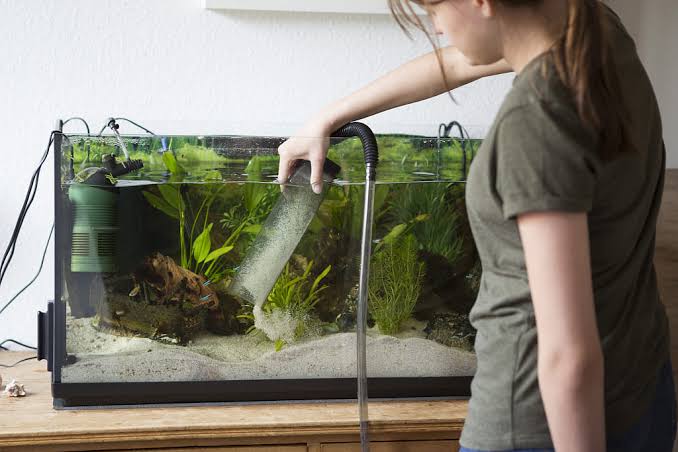
Once preparations are complete, the actual water change process can begin with siphoning out the old water. The key to starting a siphon without specialized tools is gravity and a bit of technique. Submerge one end of the siphon hose completely into the aquarium water, ensuring no air bubbles are trapped. While keeping that end submerged, quickly pull the other end of the hose out of the tank and lower it into your empty bucket, which should be placed below the level of the aquarium. As gravity takes over, water will begin to flow from the tank into the bucket. If water doesn't start flowing immediately, you might need to briefly suck on the end of the hose that's in the bucket to initiate the siphon, being careful not to ingest any aquarium water. This method requires some practice but is highly effective. As the water siphons out, use the end of the hose inside the tank to clean the gravel substrate. Gently push the open end of the hose into the gravel, allowing the suction to pull up debris, uneaten food, and fish waste while leaving the heavier gravel behind. Move systematically across the entire bottom of the tank, cleaning small sections at a time. Be careful not to suck up fish, plants, or delicate decorations. If fish get too close, simply lift the hose out of the gravel slightly. This gravel vacuuming step is vital for removing trapped organic matter that decomposes and releases harmful nitrates. The amount of water to remove depends on your tank size and maintenance schedule, but a 20-30% water change weekly or bi-weekly is a general recommendation for most freshwater community tanks. Avoid changing more than 50% at once, as this can cause significant shifts in water parameters and stress your fish. Once the desired amount of water has been removed, lift the hose out of the tank.
The final step is refilling the aquarium with fresh, conditioned water. Slowly pour the pre-conditioned, temperature-matched water from your clean bucket back into the aquarium. Pouring too quickly can stress fish and disturb the substrate. A good technique is to pour the new water onto a sturdy decoration or a hand placed just below the water surface to diffuse the flow and prevent direct disturbance to fish or plants. As you refill, observe your fish for any signs of stress. After refilling, double-check that all equipment (heater, filter) is functioning correctly and adjust any displaced decorations. If your filter was turned off during the water change (recommended, especially if changing more than a small amount of water or if the water level drops below the filter intake), remember to turn it back on.
Beyond these core steps, a few pro tips for effortless water changes without fancy tools can make the process even smoother. Consider using a smaller, lighter bucket if you have a large tank, making multiple trips rather than struggling with one heavy container. For very large tanks, two buckets and two siphons (or one longer siphon) can speed up the process. Keep all your water change tools in one designated spot, clean and ready for use. Regularly check your water parameters (ammonia, nitrite, nitrate, pH) using a liquid test kit; this will help you understand if your water change frequency and volume are adequate. If nitrates remain consistently high even with regular changes, you might need to increase the frequency or volume slightly. Remember to thoroughly clean your buckets and siphon hose with plain water after each use and store them dry to prevent mold or bacterial growth. Never use soap or detergents on any aquarium equipment. This simple, consistent manual method, focusing on thorough gravel cleaning and proper water conditioning and temperature matching, is a highly effective way to maintain a pristine and healthy environment for your aquatic companions, demonstrating that dedication to routine care is far more impactful than a collection of specialized, expensive gadgets.
Why Changing Aquarium Water is Important
Before we get into the process, let’s understand why water changes are necessary in the first place. Your aquarium may look clean from the outside, but underneath the surface:
- Waste from fish, uneaten food, and decaying plants builds up
- Ammonia and nitrites can rise, which are toxic to fish
- pH and water hardness can shift over time
- Algae may grow faster due to excess nutrients
Regular water changes help:
- Dilute toxins and maintain water chemistry
- Replenish essential minerals
- Improve oxygen levels
- Keep fish active, healthy, and vibrant
Even without tools like siphons or gravel vacuums, you can still manage all of this manually with a few precautions.
How Often Should You Change Aquarium Water?
This depends on the tank size, number of fish, and filter efficiency, but general guidelines are:
- Small tanks (up to 10 gallons): 20–30% water change every week
- Medium tanks (10–30 gallons): 25% every 1–2 weeks
- Large tanks (30+ gallons): 20% every 2 weeks or as needed
If you’re not using high-end filters or equipment, doing small and regular water changes is key to keeping water conditions stable.
Basic Tools You Can Use at Home
You don’t need electric siphons or fancy hoses. These simple items will get the job done:
- Bucket or water container (use only for aquarium use)
- Mug or small plastic cup
- Cloth or sponge (non-soapy)
- Clean towel or floor cloth
- Water conditioner or dechlorinator (affordable and essential)
Optional:
- A small tube (like from a medicine dropper or old IV set) can help you siphon manually.
Step-by-Step Guide to Change Aquarium Water Without Tools
1. Prepare Your Space
Place the bucket or water container close to the aquarium. Lay an old towel around the tank in case of spills. Wash your hands thoroughly—but don’t use soap, which can harm fish.
2. Turn Off Electrical Devices
Switch off your heater, filter, and lights to avoid short circuits and give your fish a calm environment during cleaning.
3. Scoop Out Old Water
Use a mug or cup to gently scoop out water from the tank. Avoid making splashes or stirring the gravel too much, as it can stress the fish. Collect about 20–30% of the tank water (you can mark your bucket with levels to estimate).
Tip: If you’re removing water near the bottom, do it slowly to avoid sucking up fish waste too quickly, which can cloud the tank.
4. Clean the Tank Walls (Optional)
Take a soft cloth or sponge (reserved only for the tank) and gently wipe algae or debris off the tank walls.
Don’t use any detergent or soap.
5. Rinse the Decorations (If Needed)
If ornaments or plastic plants are dirty, rinse them in the old tank water (not tap water) to preserve helpful bacteria.
How to Add Clean Water Safely
This is just as important as removing old water. Here’s how to do it right:
1. Use Dechlorinated Water
Tap water usually contains chlorine or chloramine, which can kill fish. Use a dechlorinator or let the water sit in an open container for 24–48 hours to let chlorine evaporate.
Always check water temperature—it should match your tank’s existing water (use your hand or a thermometer).
2. Slowly Pour the New Water
Gently pour the clean water back into the tank using a cup or small jug. To reduce splashing or disturbing the substrate, pour against a rock or wall inside the tank.
3. Restart Equipment
Turn your filter and heater back on. Wait a few minutes to ensure everything is running smoothly. Your fish may seem curious or startled at first but will adjust quickly.
Benefits of Doing It Manually
Even though siphons and gadgets make life easier, there are surprising benefits of doing it manually:
- You get to observe your fish closely
- Less risk of over-suction and harming delicate fish or shrimp
- Encourages consistent care and awareness
- Cost-effective and perfect for beginners and kids
Tips to Make the Process Easier and Faster
- Use two buckets: One for removing dirty water, one for storing clean water
- Keep a designated “aquarium-only” cloth and mug to avoid chemical residue
- Do water changes during calm hours (not feeding time)
- Add live plants to reduce waste buildup
- Keep a weekly routine—set reminders on your phone
Common Mistakes to Avoid
Even manual changes can go wrong if done too fast or carelessly:
1. Changing Too Much Water at Once
It can shock your fish by altering water chemistry. Always stick to 20–30% unless it’s an emergency.
2. Using Soap or Dirty Containers
Any residue from detergents can be lethal to fish. Always rinse thoroughly and never use kitchen tools.
3. Ignoring Temperature
Sudden changes in water temperature can stress or even kill fish. Match it closely before pouring.
4. Not Using Dechlorinator
Chlorinated water kills both fish and beneficial bacteria. Always treat tap water if not left standing.
Myths About Aquarium Water Changes: Busted!
“If the water looks clean, I don’t need to change it.”
→ Wrong. Harmful toxins are invisible and build up silently.
“I’ll just top off the water instead of changing it.”
→ Topping up replaces evaporated water, not toxins. Always remove old water too.
“Fish get stressed during water changes, so better avoid.”
→ If done gently, water changes actually reduce stress by improving quality.
“Only expensive tools can clean tanks properly.”
→ False. With basic tools and consistency, you can achieve a healthy tank.
Sample Weekly Water Change Plan (No Tools Needed)
Monday
- Observe fish for any odd behavior or waste buildup
- Remove algae with sponge or cloth
Wednesday
- Remove 25% of water using cup
- Add dechlorinated water slowly
- Rinse filter pads with old tank water if dirty
Sunday
- Light wipe-down of glass
- Rinse plants or decorations if needed
- Feed fish after the water settles
Advantages of Regular Manual Water Changes
✅ Keeps ammonia, nitrate, and nitrite levels safe
✅ Improves oxygen content and clarity
✅ Prevents algae overgrowth
✅ Enhances fish color and energy
✅ Builds a healthy microbiome in the tank
Conclusion
Maintaining a healthy aquarium doesn't require expensive gear or fancy gadgets. By using basic household tools, a little patience, and some simple techniques, you can easily change your tank water and keep your fish thriving.
Whether you're a beginner or someone looking for budget-friendly methods, manual water changes offer a simple yet highly effective way to ensure your aquarium stays clean, safe, and beautiful. It's not about the tools—it’s about the consistency and care.
Start small, stay regular, and your aquatic pets will thank you with vibrant colors, active swimming, and long, healthy lives.
Your tank may be small, but your care makes a big difference.
Q&A Section
Q1: Why is it important to change aquarium water regularly?
Ans: Regular water changes remove toxins, uneaten food, and fish waste, ensuring a clean and healthy environment for your fish.
Q2: How often should I change my aquarium water?
Ans: Ideally, change 20–30% of the water weekly or every 10 days, depending on your tank size and fish load.
Q3: What basic items do I need to change aquarium water without fancy tools?
Ans: You only need a clean bucket, a mug or cup, a siphon hose (optional), and dechlorinated water.
Q4: Can I use a simple mug instead of a siphon hose?
Ans: Yes, a mug or small container can be used to scoop water out and pour fresh water in, although it takes a bit more time.
Q5: How can I remove debris from the gravel without equipment?
Ans: Gently stir the gravel with your fingers or a stick, then scoop out the dirty water using a mug or cup.
Q6: Do I need to remove the fish while changing water?
Ans: No, removing the fish is unnecessary and can stress them. Just change the water slowly and carefully to avoid disturbing them.
Q7: What type of water should I add back into the aquarium?
Ans: Use dechlorinated tap water that is at the same temperature as the tank to avoid shocking the fish.
Q8: How can I dechlorinate tap water naturally at home?
Ans: Let the water sit in an open container for 24–48 hours, or use vitamin C or water conditioners if available.
Q9: Should I clean the entire tank every time?
Ans: No, deep cleaning every time removes beneficial bacteria. Just partial water changes and surface cleaning are enough.
Q10: How can I make water changing easier and part of my routine?
Ans: Set a reminder, keep a designated bucket nearby, and change a small portion frequently instead of large volumes at once.
Similar Articles
Find more relatable content in similar Articles
Explore Other Categories
© 2024 Copyrights by rPets. All Rights Reserved.